How to Connect to Your WordPress Server on AWS using a SSH client
You created an AWS virtual server instance and installed WordPress on it. Your WordPress site is public on the internet. You still need to manage your server such as adding a free SSL certificate to your website.
In this article, I show you how you can access to your server to manage it using a SSH client. We are going to use PuTTY.
Step 1: Download PuTTY
Step 2: Install and Open PuTTY program.
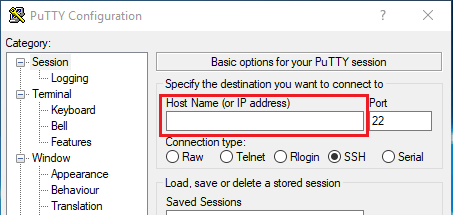
Step 3: Enter the host name or public IP address of your server into the Host Name (or IP address) field.
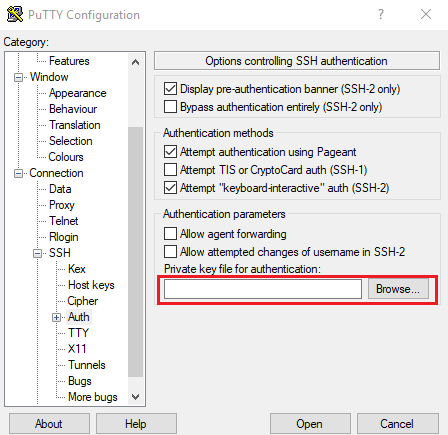
Step 4: Select your private key file for authentication (Connection -> SSH -> Auth -> Browse)
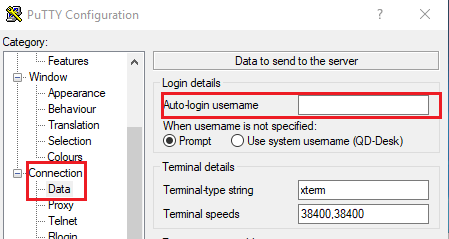
Step 5: Enter login details. enter your username in the Auto-login username field (Connection -> Data -> Auto-login username). If you setup WordPress on AWS using Bitnami image, the username is binami.
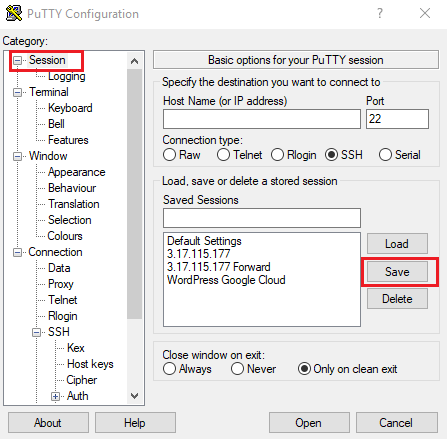
Step 6: Save your configuration. Click Save in the Session


Leave a Reply